I actually got asked this question via email 3 times within a week and immediately wrote it on my list of things to post as an FAQ – and then just kept putting it off!! So here it is – FINALLY! 🙂
I realize everybody may do this differently – but this little post is about how I do it! If you do it your own way that works for you – then go on with your bad self! 😉 Anyway, as you guys know – I blog A LOT. And when I blog – I usually include A LOT of images. So it is really important to me that the images on our blog look great! And it is equally important to me that it doesn’t take me one million years to prep images for blog posts! (I’ll also mention in here how I prep images for Facebook, and submission to wedding blogs as well… which is really all the same, just a little different tweak in the process.)
So here’s how I do it!
1. Edit & process your images. I edit and process all my images as I normally would (in Lightroom, with some extra touch-ups in Photoshop if necessary now & then). I export them as JPGs from Lightroom at 100% quality… no resizing, no sharpening, no nothing.
2. Choose images you want to post. I chose the images I want to use in the blog post and drag them into Blogstomp (best program ever!) If you don’t already use this – go buy it already! It is $49 and will save you so. much. time.
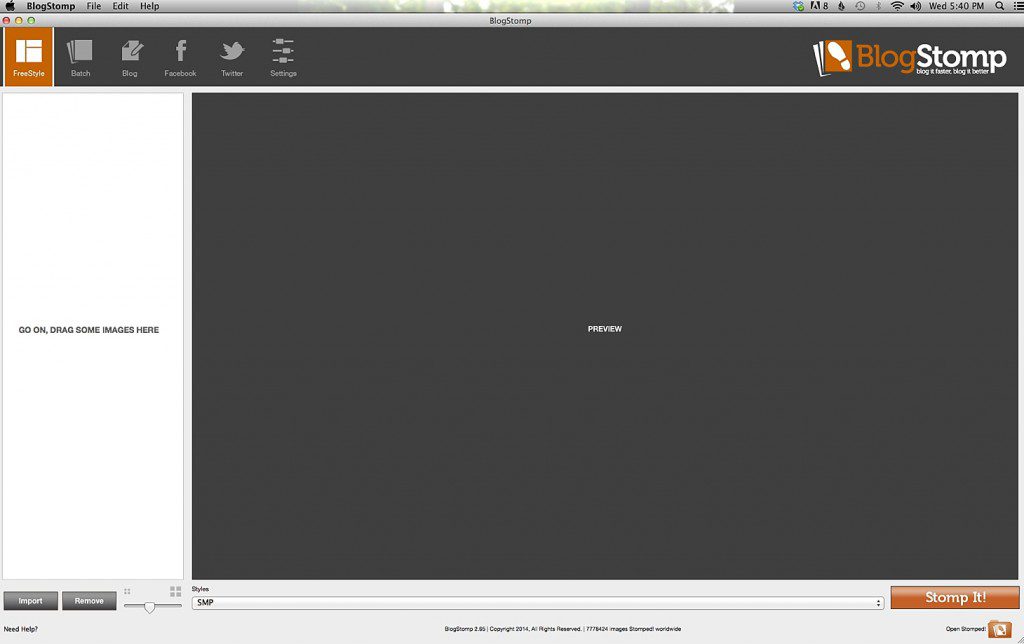
3. Select the appropriate “Style” in BlogStomp for the platform where you plan to post the image. Within BlogStomp I’ve created numerous “Styles.” Basically, these are presets you create that you can select so your images are resized and prepped for specific purposes. For example, I have a preset I created for my blog, for submitting to Style Me Pretty (and other blogs with different pixel dimension requirements), and for Facebook… to name just a few. Depending on where I’m posting the images, I select the appropriate “style.”
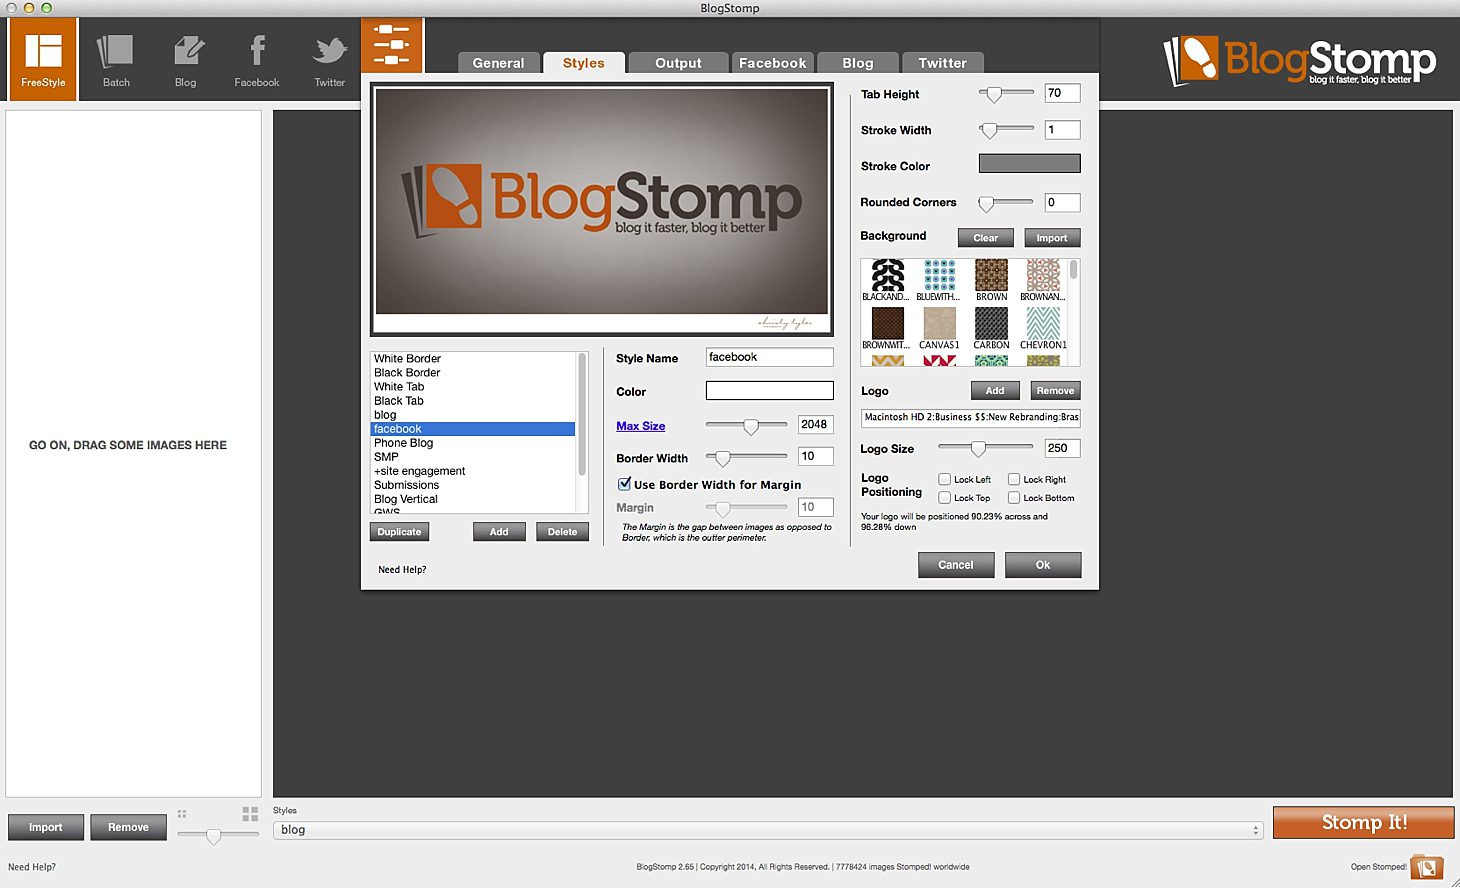
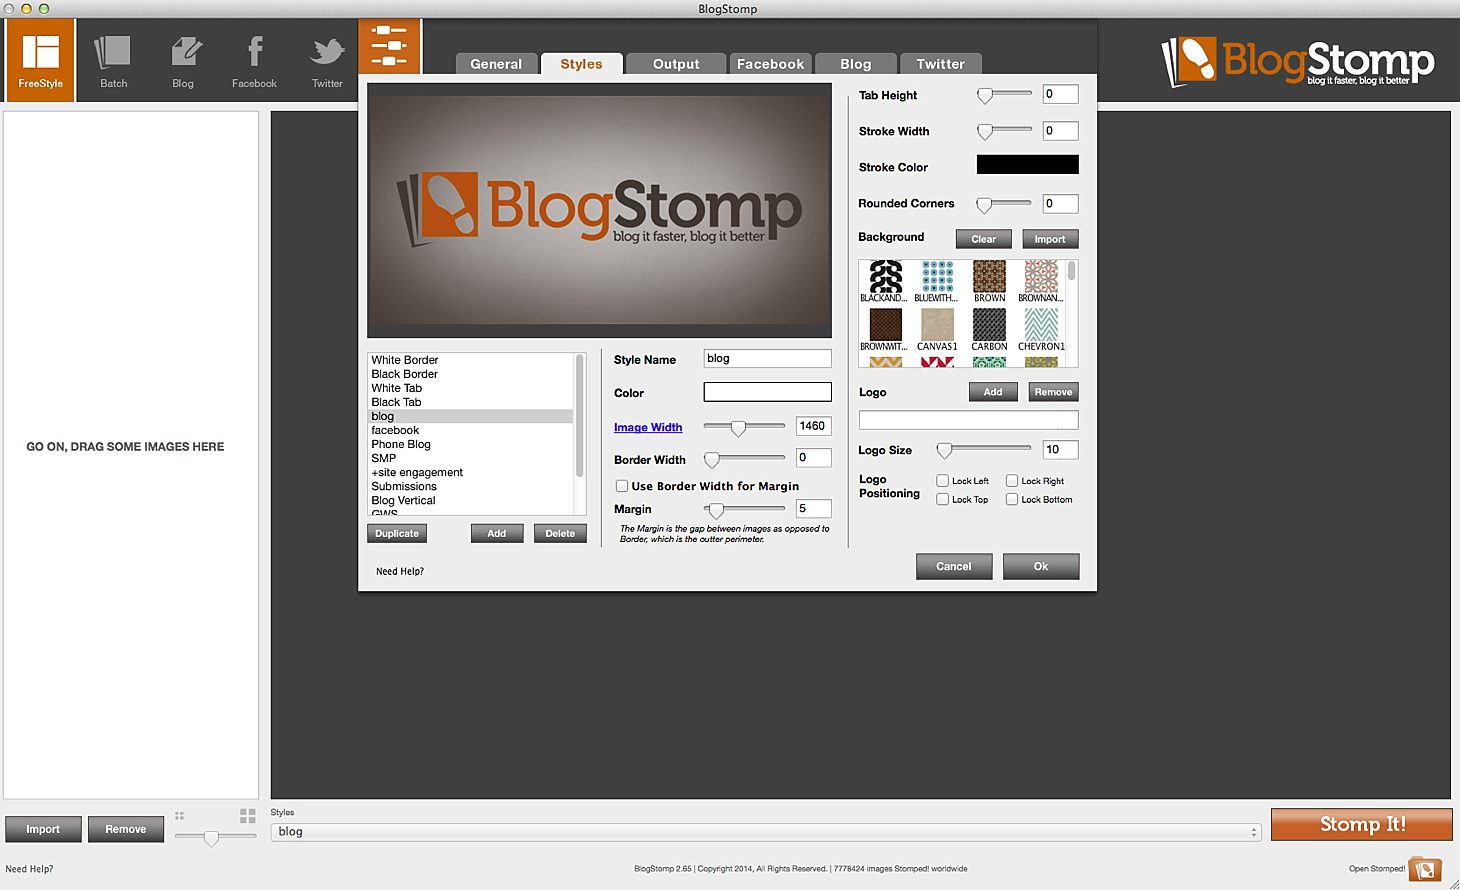
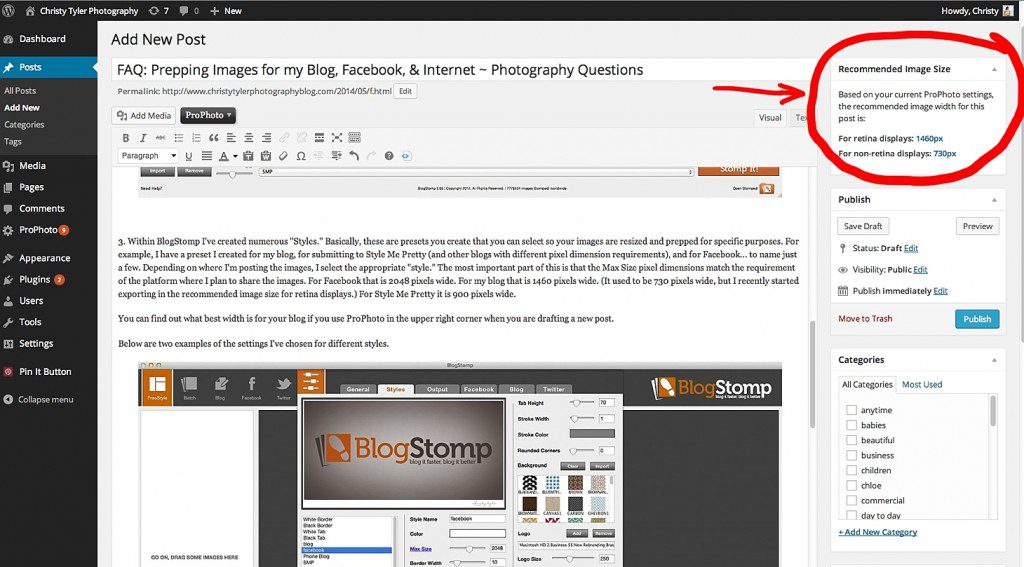
The most important part of this is that the Max Size pixel dimensions match the requirement of the platform where I plan to share the images. For Facebook that is 2048 pixels wide. For my blog that is 1460 pixels wide. (It used to be 730 pixels wide, but I recently started exporting in the recommended image size for retina displays.) For Style Me Pretty it is 900 pixels wide.
You can find out what best width is for your specific blog design (if you use ProPhoto in WordPress) in the upper right corner when you are drafting a new post. (See image below…)
4. Sharpen images when resizing. When you shrink an image’s size, it will naturally lose some sharpness, so I have BlogStomp set to automatically sharpen any images I stomp. You can find this setting under “Settings” –> “Output” –> “Sharpening” (at the bottom of the Output window). I have mine set to Basic Sharpening at 25.
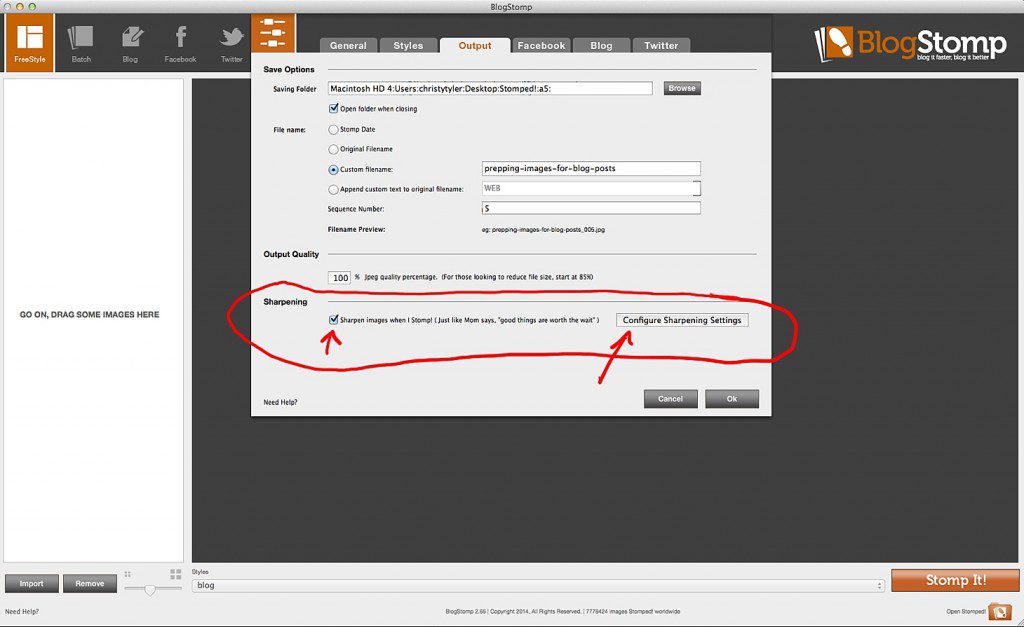
5. Create a custom filename to describe the images or blog subject. (You can see where to do this in the image above… It is under “Settings” –> “Output” above where you can create the custom filename.) Depending on what I’m posting, I rename the images appropriately. For example: “the-wit-wedding-photos” OR “chicago-proposal-photographer” OR “romantic-montrose-beach-engagement-photos” … and on and on! Doing this helps Google to know what your images are – so when people Google search under the Image tab – your images will pull up! If you leave it as whatever crazy name your camera assigns your images, like IMG_0215.jpg, it will never find your images in a search! Trust me!
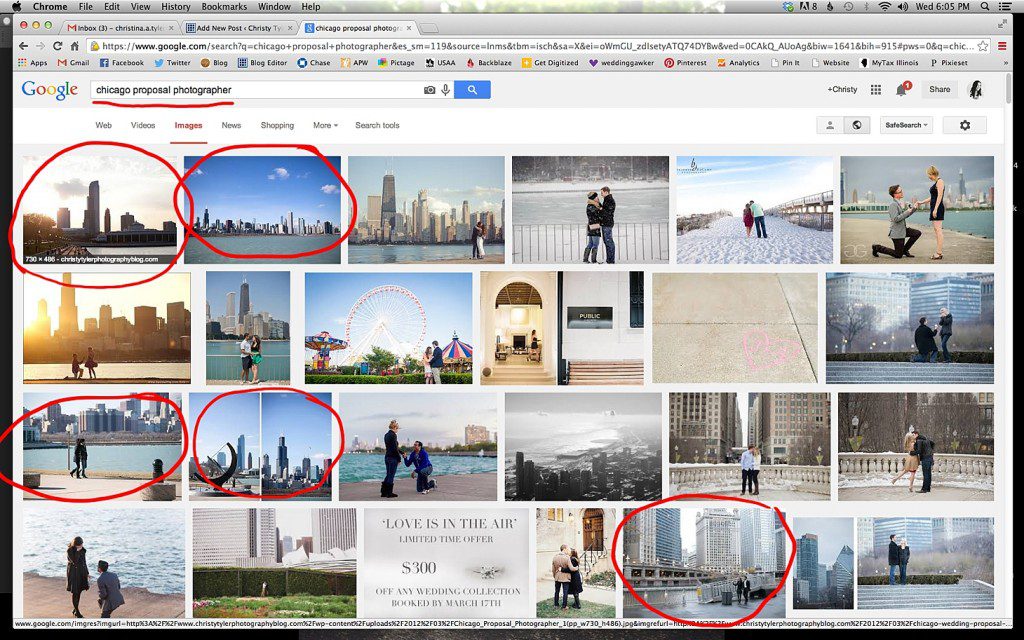
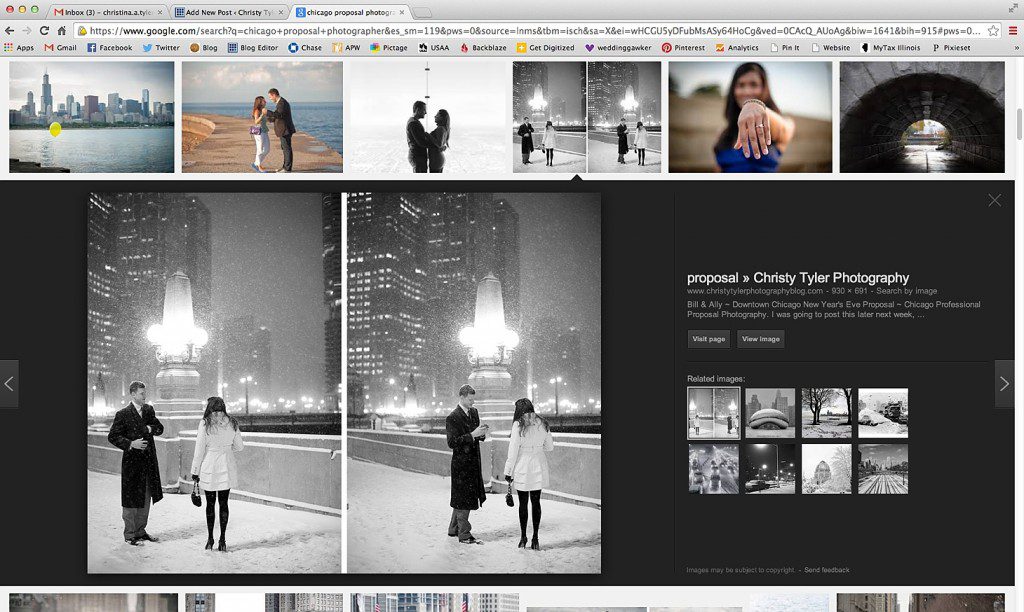
And the best part is – when they click on any specific image – it opens it up larger and gives people the option to click through to Visit the Page. We’ve booked a good number of weddings thanks to Google searches for a venue we previously shot at… so this is absolutely worth taking the time to do!
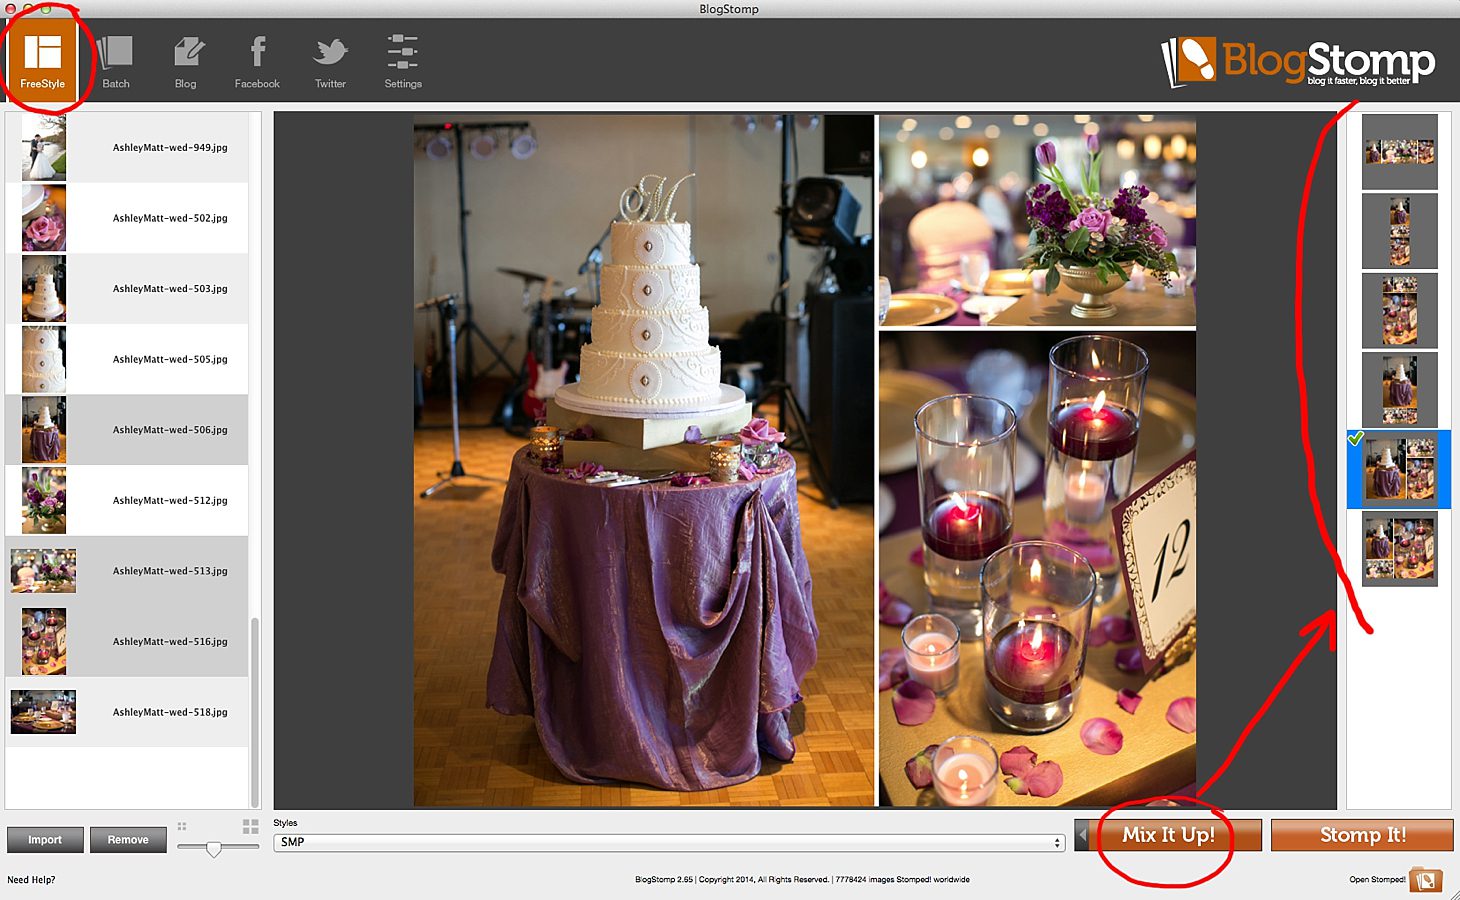
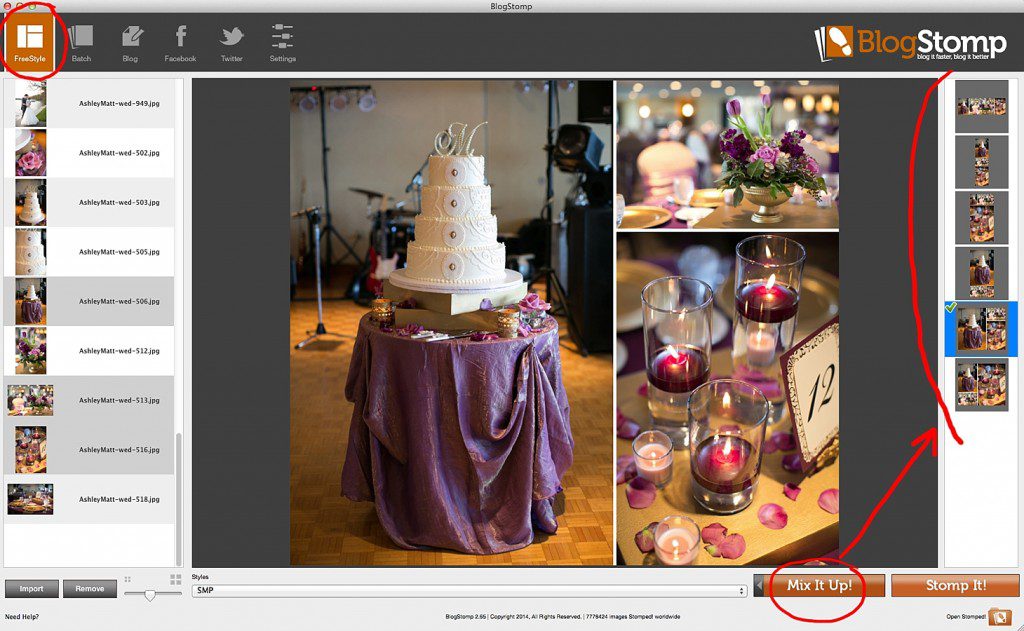
6. Stomp your images!! I use the Freestyle option for my blog posts – so I can select which images are paired up and how. I just hit the “Mix It Up” button if I want to see another option for how the images I selected can be paired.
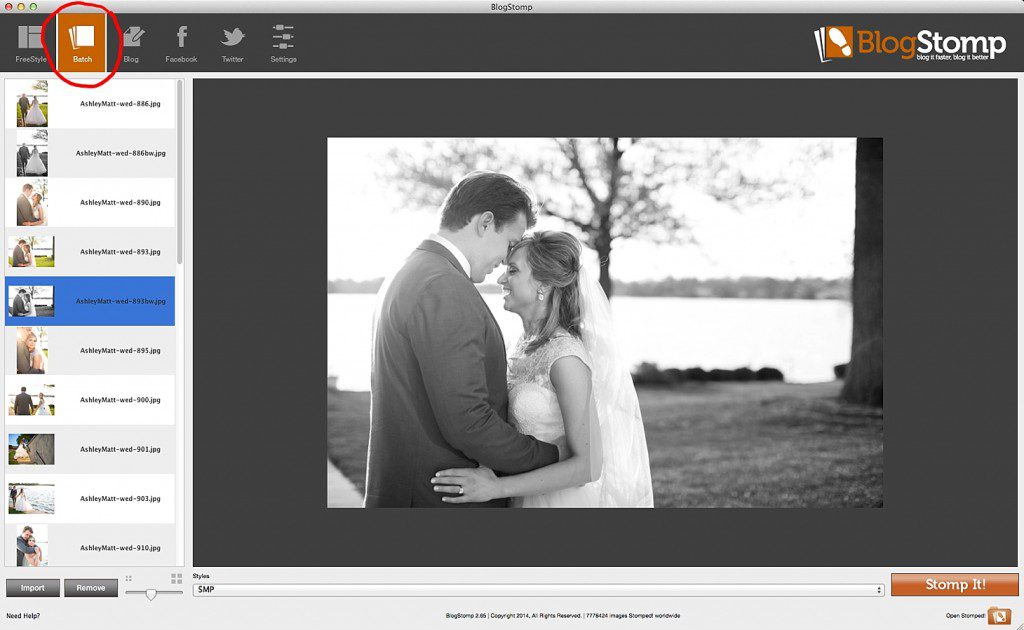
I use the Batch option for when I’m simply resizing, renaming, and sharpening images for submission to wedding blogs, like SMP. You simply hit the Batch option up top, then hit Stomp – and they are all done in a row without touching another button!
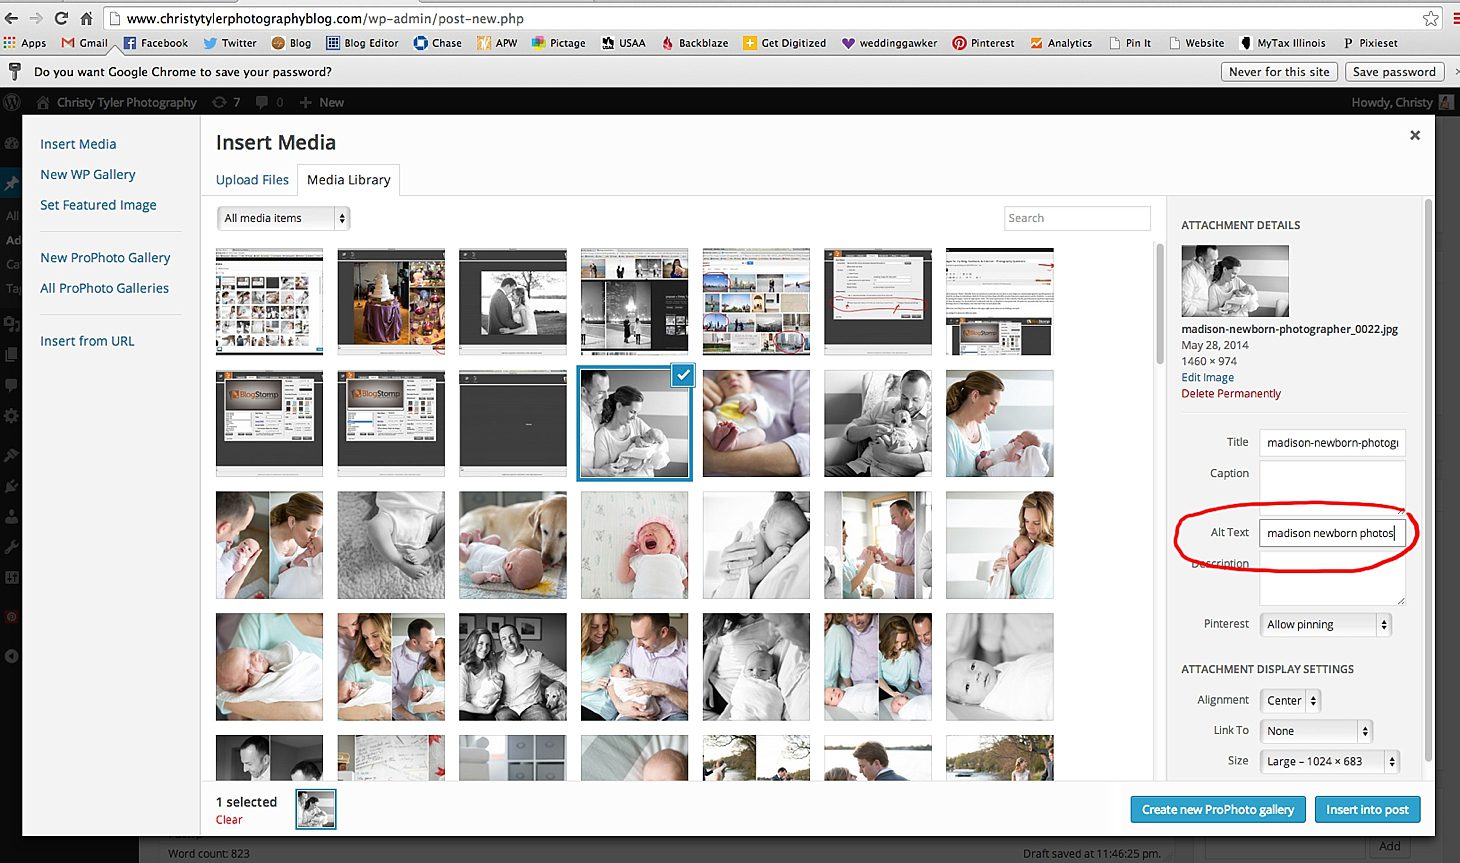
7. Enter “Alt Text” when uploading the images to your blog. This is another step that goes along with renaming the images themselves. It takes a bit to upload the images to the blog anyway – so as they upload one-by-one you’re able to edit the “Alt Text” to describe more about the image. This is another way Google uses to find images of things that people are searching for. (Of course you also should use keywords within your post itself that match what you’re hoping people will Google search – but that’s another FAQ post all itself!)
If I didn’t thoroughly explain this, or if you have any questions – please let me know! I hope this helped people out there struggling with properly naming, resizing, and sharpening their images to look their best on the web! xoxo

