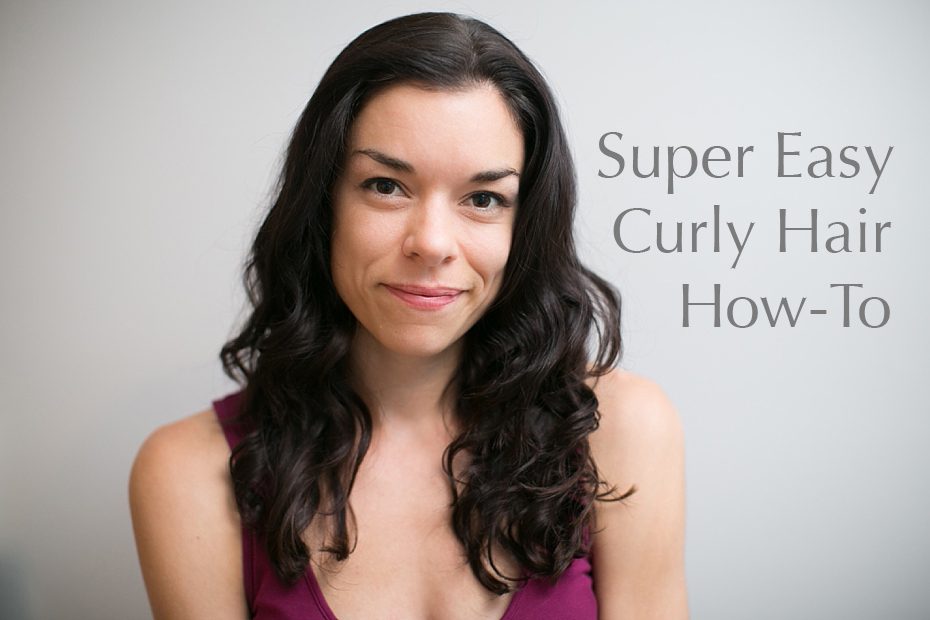
As I’ve gotten older, it seems with each year comes something new. When I hit my late 20’s I developed seasonal allergies (not so fun). And when I turned 30 a couple years ago my hair started to get quite the curl/wave to it if I let it air dry (definitely more fun). The only problem was that I had straight hair for so long that I was at a complete loss about how to do this new-to-me wavy/curly hair!
For the longest time I didn’t attempt to do anything with it. I blow dried my hair and just let it stay straight. But recently since I’ve been working for myself, I let my hair air dry much more often – which resulted in crazy, out of control, frizzy curls… so I decided I finally better figure out how to do this mop on my head! After posting on Instagram about what a loss I was at with where to start, the super sweet Your Stylist AJ contacted me and offered to give me a few curly hair tips!
I posted about how her tips helped me get my hair into shape without much work at all on Instagram and had quite a few people asking me for my How-To… so I’m FINALLY blogging my curly hair how-to steps! Some of these are tips AJ gave me (products, hair twirling), and some of them are things I’ve come up with on my own since then (messy bun, etc) to make my hair do (mostly) what I want.
So here it is – my Curly Hair How-To. (Full disclaimer, my hair is more naturally wavy than it is super curly… so I’m not sure how this will work for you all out in internet land! But hopefully it’s able to help at least one person! Let me know how it goes if you try it!)
What I use:
Remington T Studio Curling Wand
Bumble & Bumble Thickening Full Form Mousse
1. Towel dry hair, comb through, and towel dry again.

2. Put a small amount of Aveda Be Curly Style Prep in palm of hand and rub hands together to distribute evenly over palms.

3. Finger through hair to distribute the Aveda Be Curly Style Prep… combing through ends first, and working your way up higher towards the root.

4. Take chunk of hair, comb straight out from roots (for more volume) and twist.

5. Twist full head of hair in chunks. Continue to twist as necessary as hair begins to air dry.

6. (This next part is my addition) When hair is close to dry/slightly damp – comb through hair with fingers, pulling hair up into a high ponytail.

7. Twist hair into a curl enhancing bun. (I don’t really know how to explain how I do this except to show photos (which I’m not sure make sense! haha). Basically – I never pull my hair all the way through my hair tie. I fold the ponytail in half, pull the hair tie over it, fold the remaining hair in half again and pull the hair tie over it again… and then tuck in the last end of the hair into the hair tie – creating a continuous curl.)


Like so…

8. Go about your day until hair is dry, and remove hair tie. Here’s how it looks straight out of the bun…

9. Shake head to spread/loosen curls.

Obviously the top of the hair is flatter than the middle & ends – as seen below…

10. Use a curling iron to clean up the pieces around your face and the top of your head.

11. Then I use the Bumble & Bumble Thickening Full Form Mousse to clean up/smooth the curls a bit and to help hold the curl. Put a small amount in palm, and rub hands together to distribute evenly.

12. Lightly comb mousse through hair to smooth & separate curls.

That’s it!

I know it might sound like a lot – but I swear it isn’t! 🙂 I basically put in product, twist & let it air dry some. Then pull my hair into the curl enhancing bun and let it dry. Take it out – curl a couple pieces and put in the mousse to smooth/separate. And done!
Side note – you can do steps 1-8 before bed, sleep with a towel on your pillow, let hair air dry in the bun over night, and complete the last few steps the next morning before running out the door!
Let me know how it goes if you try it!! Good luck!!!