Facebook was making me really angry for a while there – because they left you no option but to crop whatever photo you wanted to use as your profile picture to a teeny tiny square crop. I get needing a thumbnail version of your profile picture – but cropping the original photo you upload, so when friends click on it to see it larger it looks like an awful, pixelated, low-res square version of your original photo…??? Not cool, Facebook, not cool!!!
As a professional photographer this especially drove me crazy because I saw client after client changing their profile picture to a wedding or engagement photo we took for them (which we LOVE!!), but Facebook required they crop it to a teeny tiny square crop! Not only does it make the picture look like terrible, low-resolution quality when enlarged, it also ruins the integrity of the original composition of the photo (which we photographers actually care a whole lot about when we are composing an image, before snapping that shutter button)! So a vertical or horizontal image that we composed a certain way for a reason, is suddenly cropped down to a little square – losing a lot of the photo’s impact, not to mention its quality and resolution.
Thankfully – when I went to change my profile picture recently – I saw Facebook finally changed their options back so you don’t have to crop your photo when uploading it for your profile picture!!!! OH MY GOSH – YAAAAY!!!! You have no idea how happy this made me!!!! haha!! Yes, I am this bothered by all of this that I was super excited about this recent change AND felt the need to post a Public Service Announcement blog to all our clients (and anyone else out there who this drives crazy) on how to NOT crop your profile picture when uploading it!!!
It is super easy, still allows you to set your “thumbnail” so you can choose how the little squares will show up when you comment, etc, but also allows your photo to retain its original high-resolution quality and composition when clicked to enlarge it!!!
Here’s how!!! (**Note: This must be done from a COMPUTER. If you attempt to do it from your phone or a tablet, it doesn’t give you the same options.)
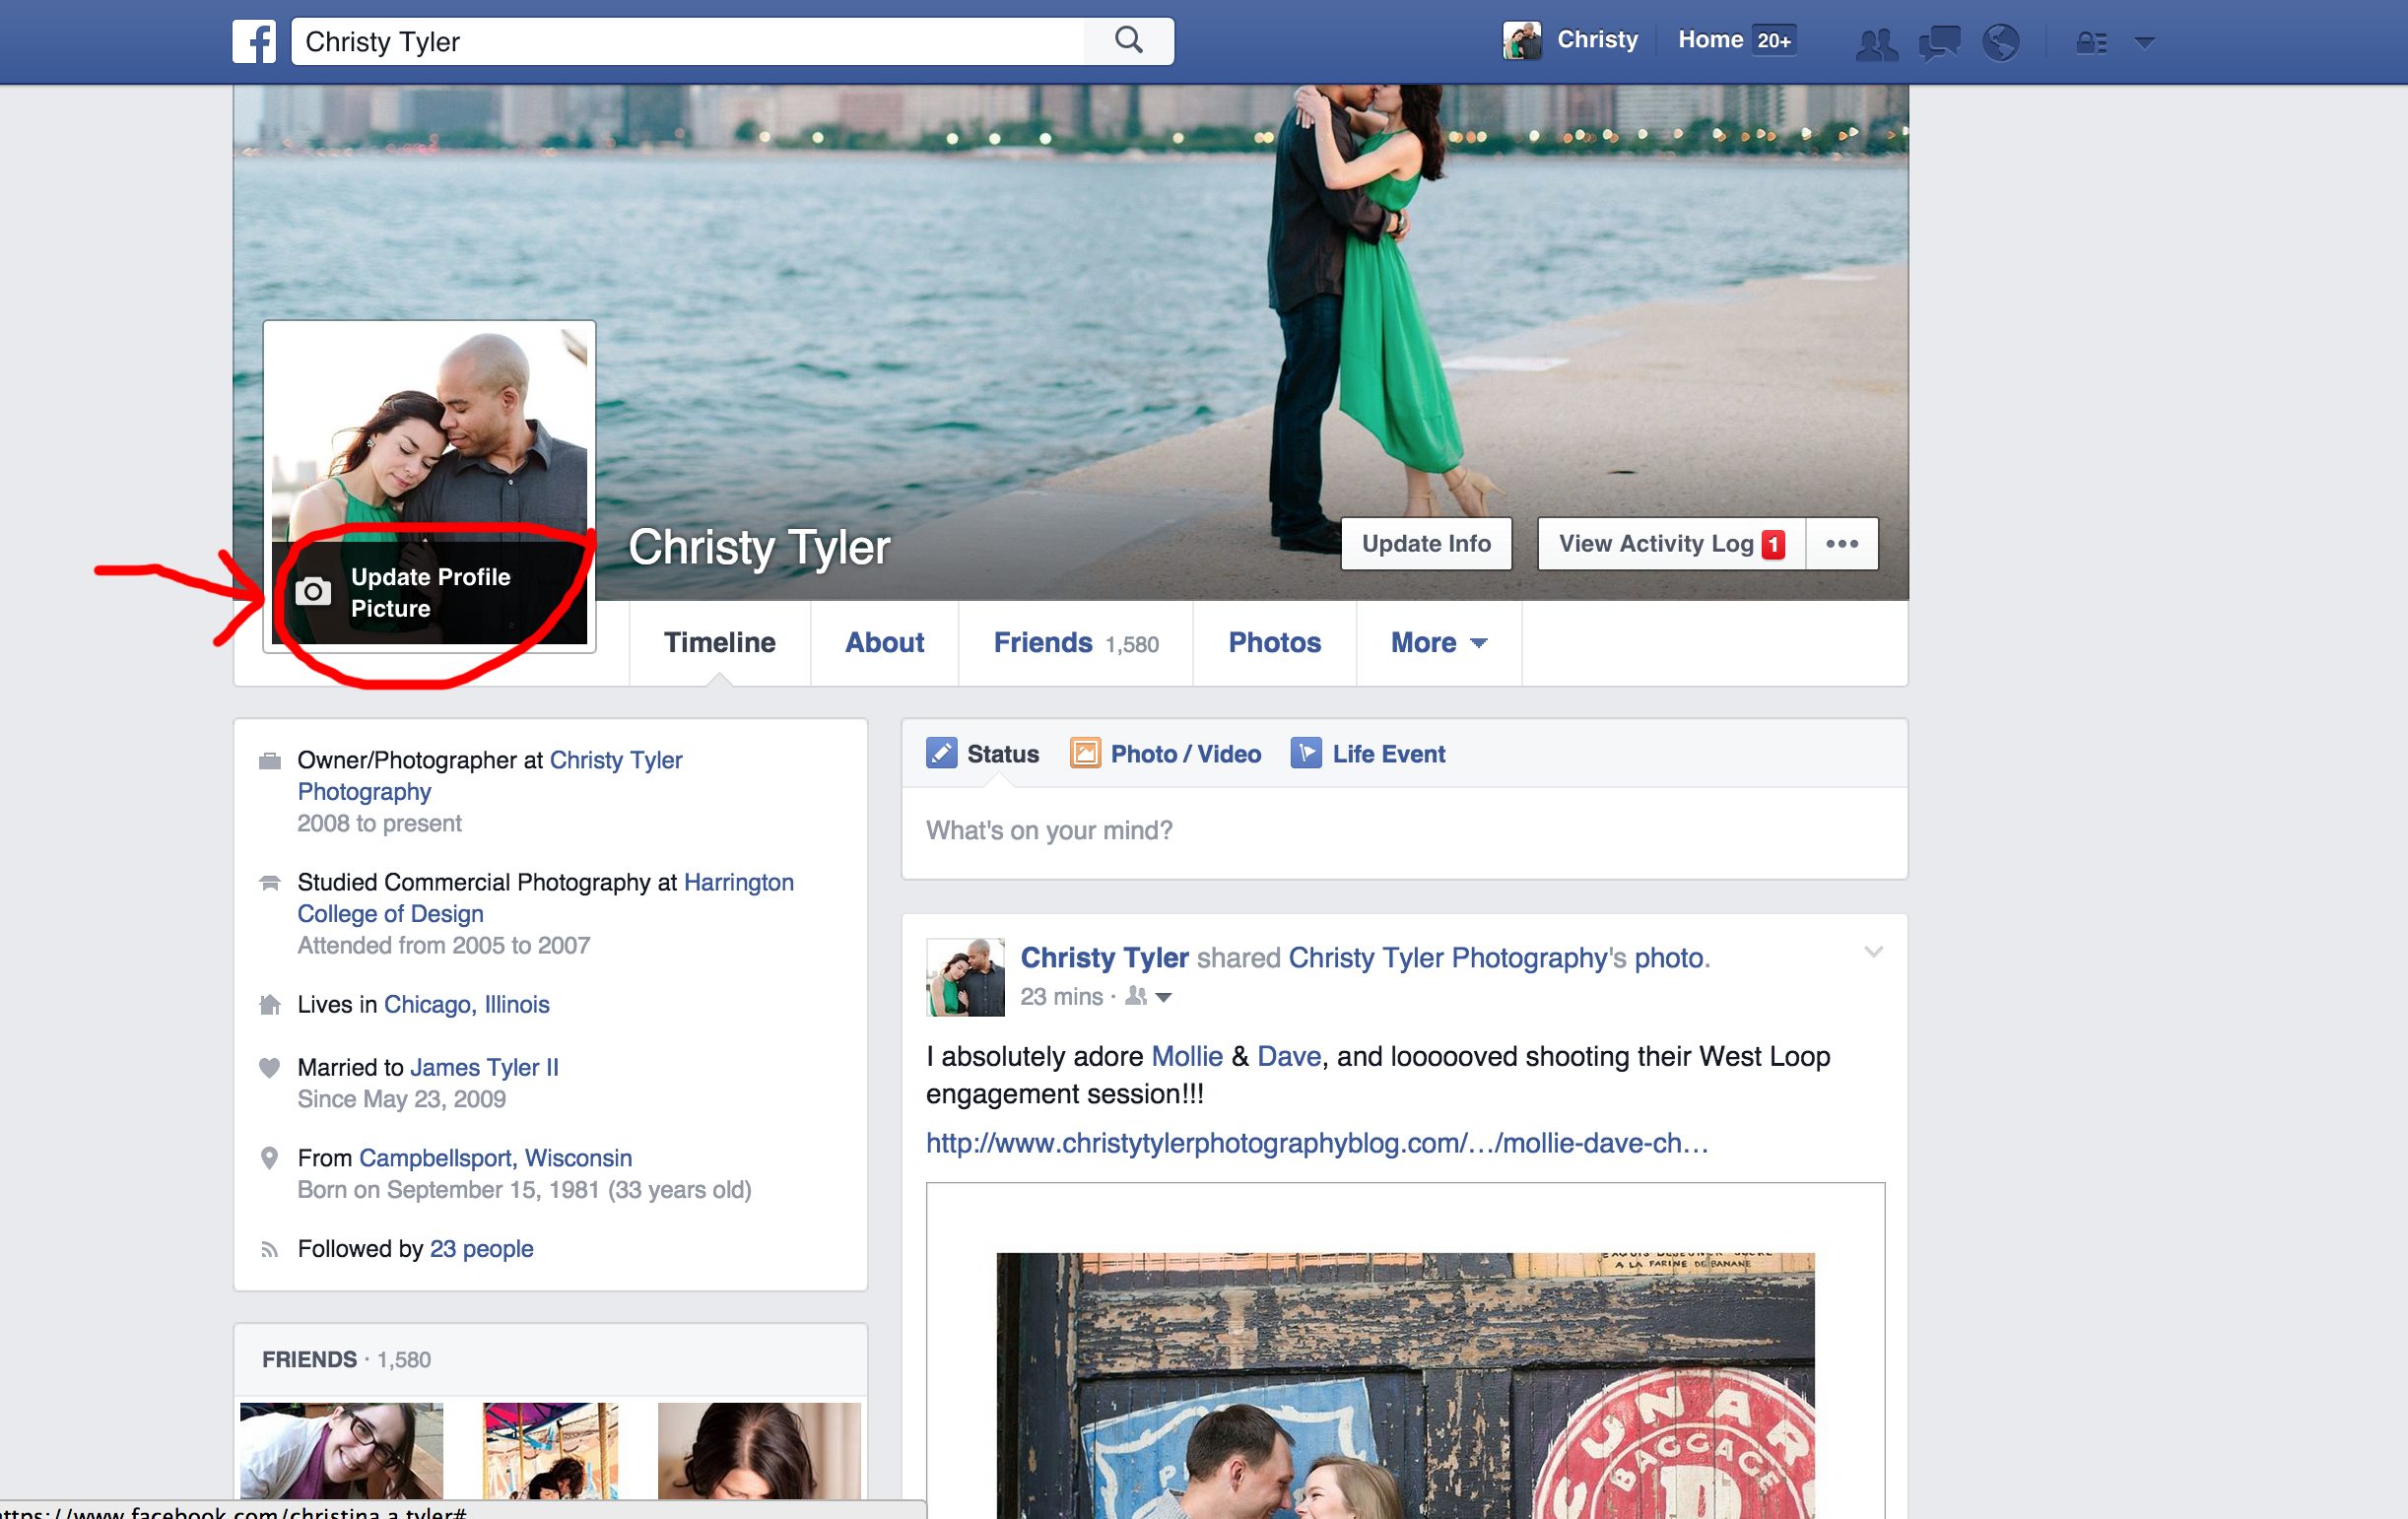
1. Hover over the little camera icon on your profile picture and click “Update Profile Picture.”
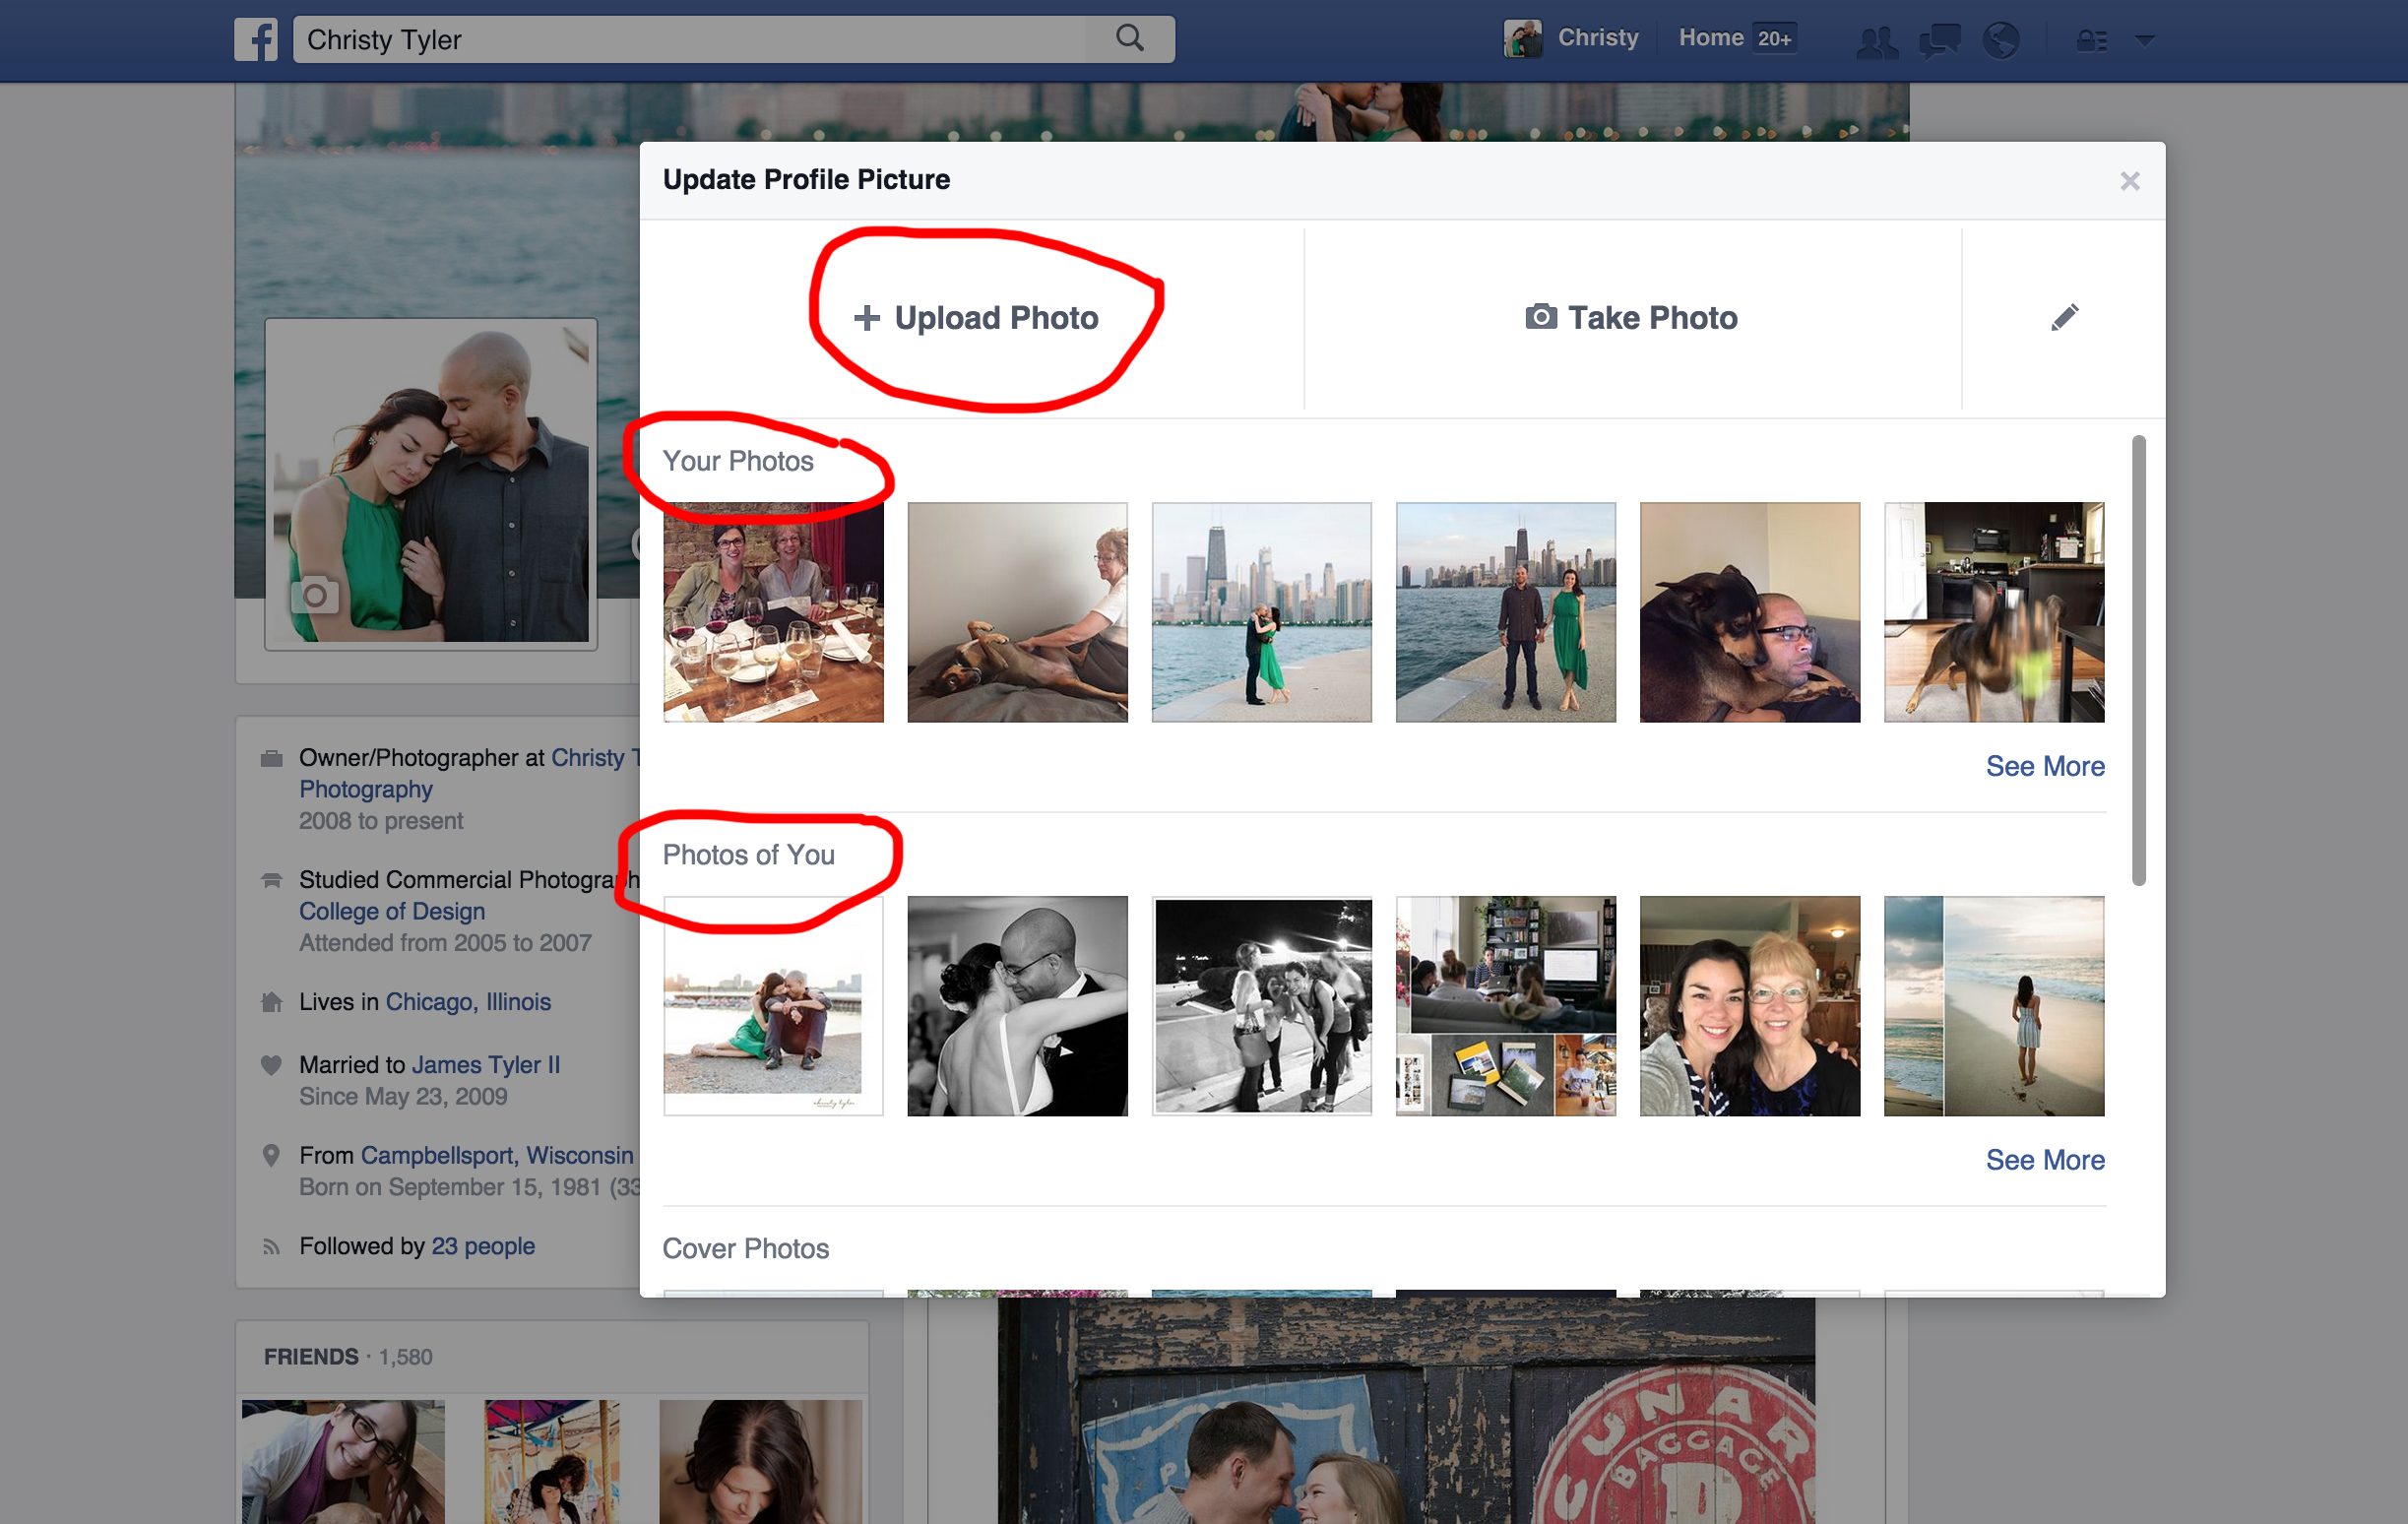
2. A little box will pop up that will allow you to “Upload Photo” or choose from “Your Photos” or “Photos of You.” Click whichever is appropriate in your situation.
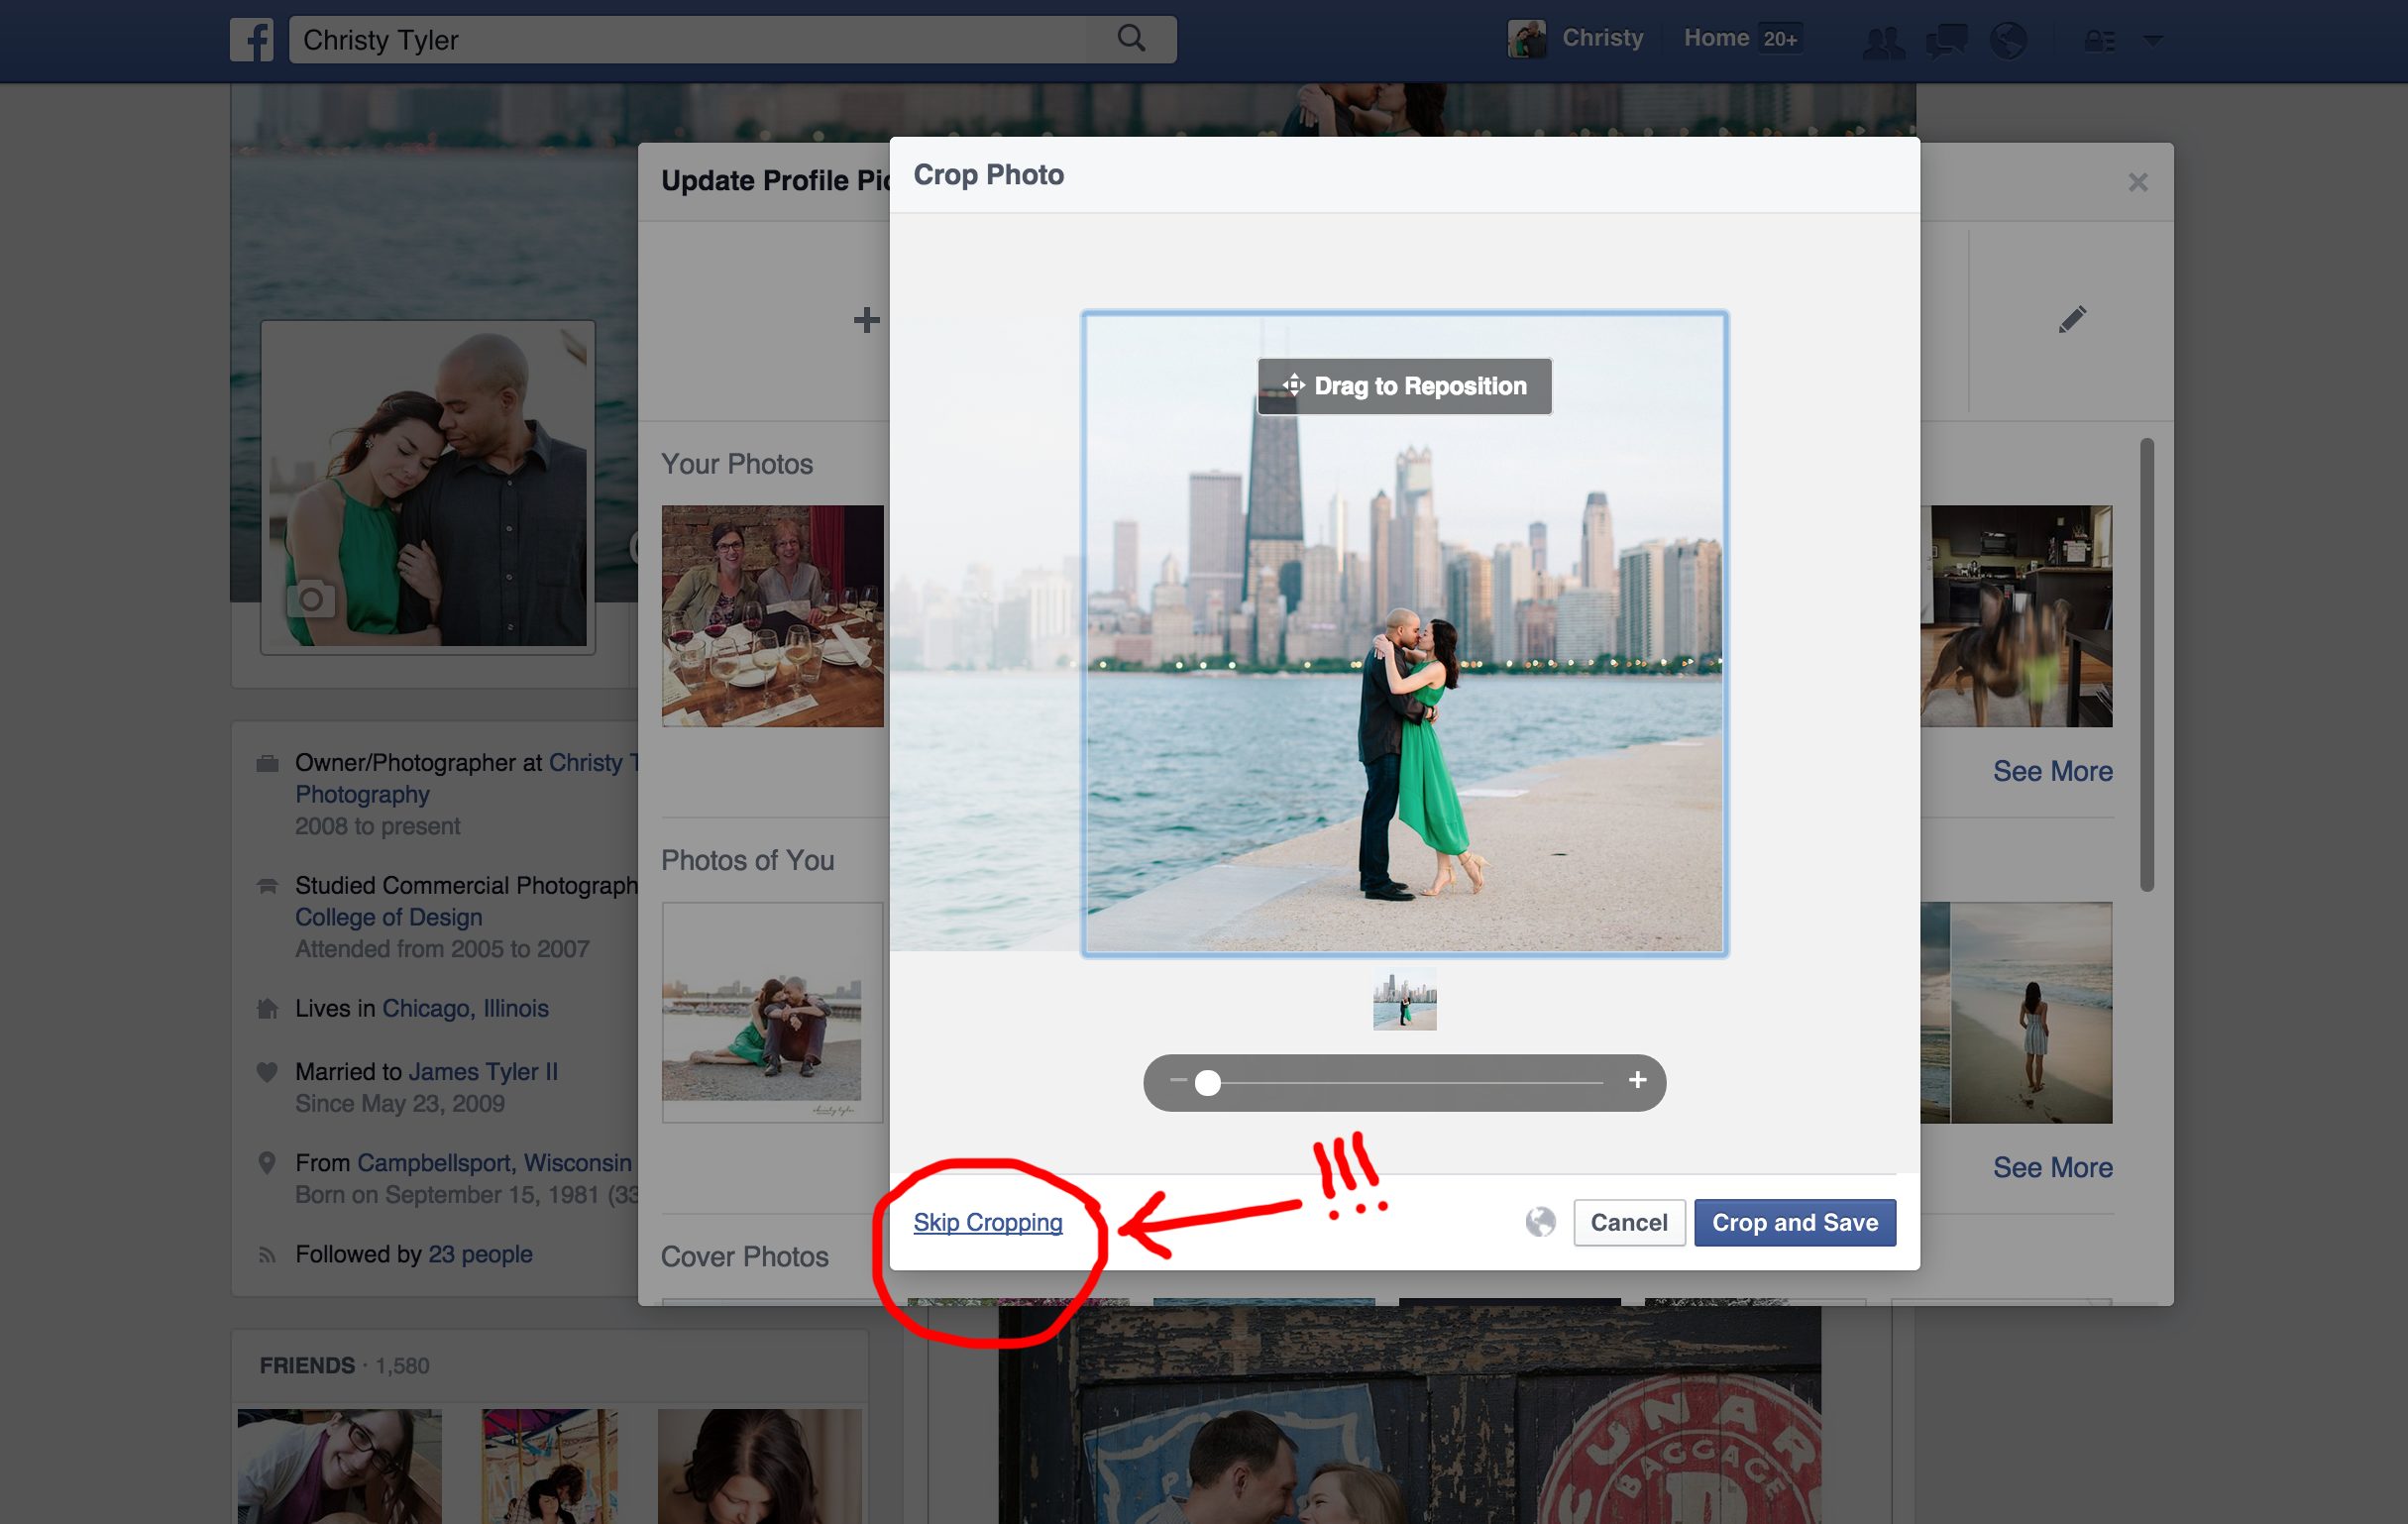
3. Once you’ve chosen the photo – another box will pop up that lets you “Crop and Save” the photo. DON’T DO IT!!! Choose the “Skip Cropping” button on the lower lefthand corner of the pop-up box!!!!
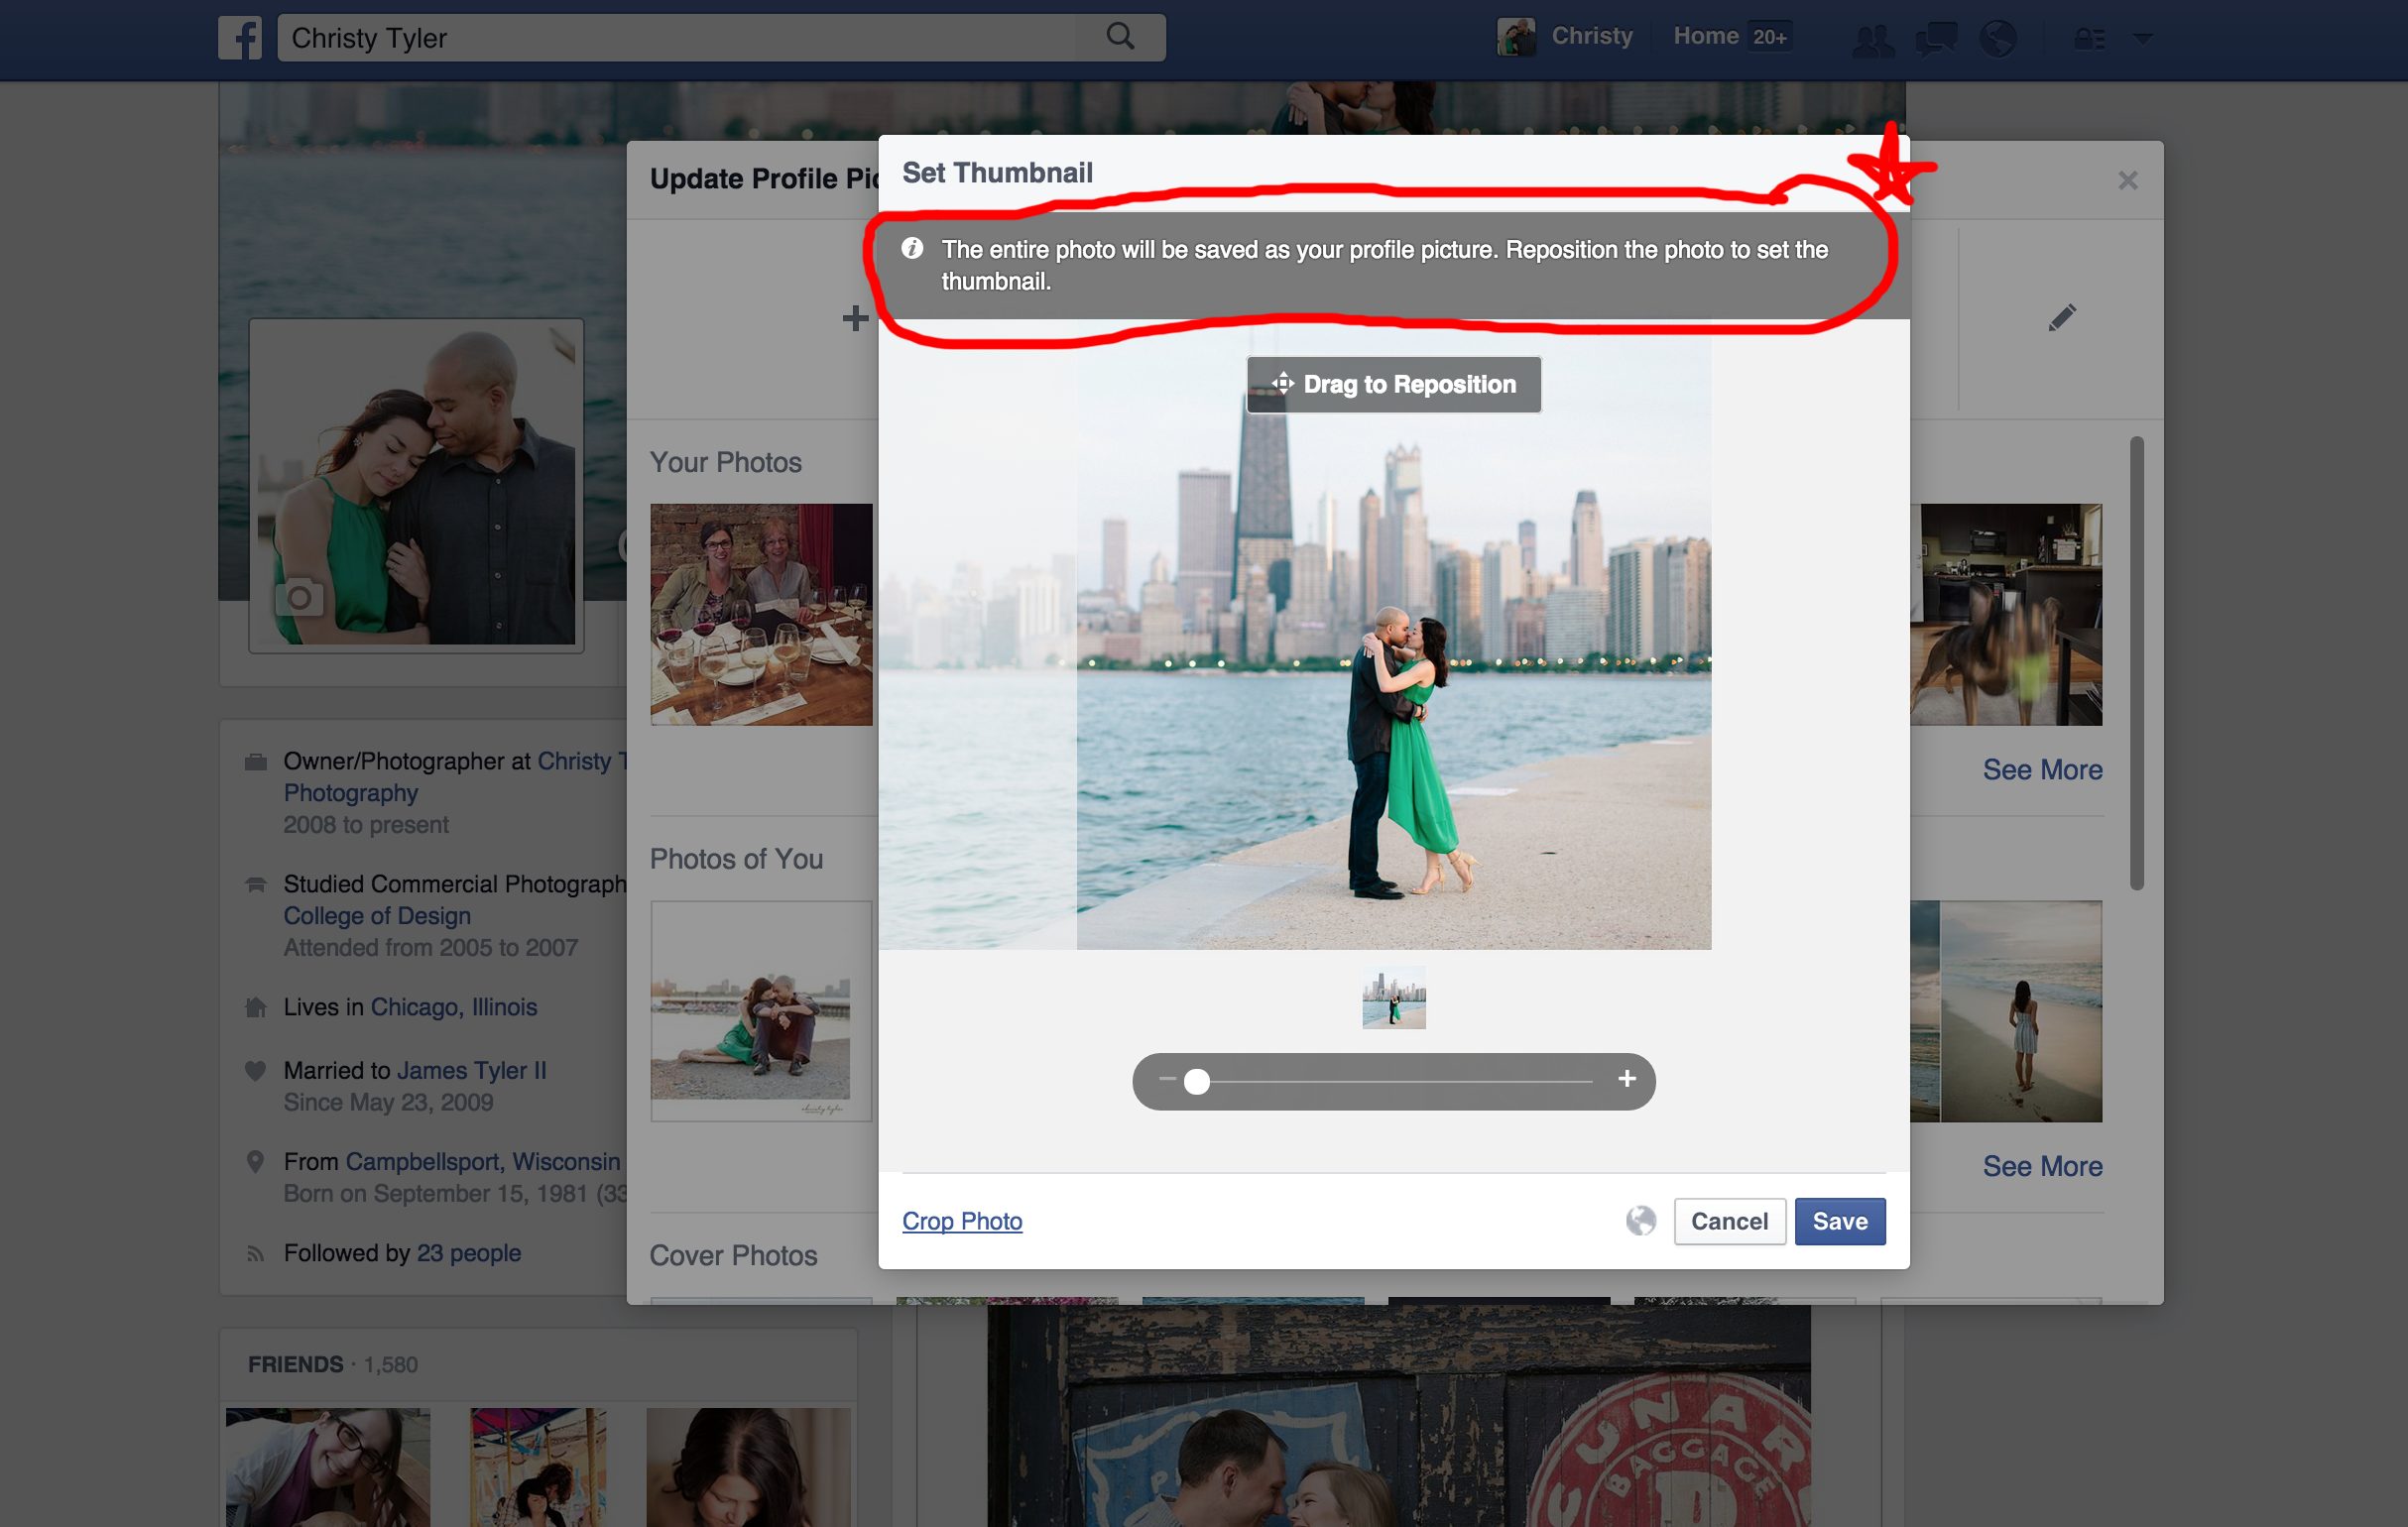
4. SUCCESS!!! It tells you “The entire photo will be saved as your profile picture. Reposition the photo to set the thumbnail… which is how your photo will appear when you’re using Facebook.
So this is how my profile picture looks when I’m using Facebook normally…. (because I set this thumbnail)…
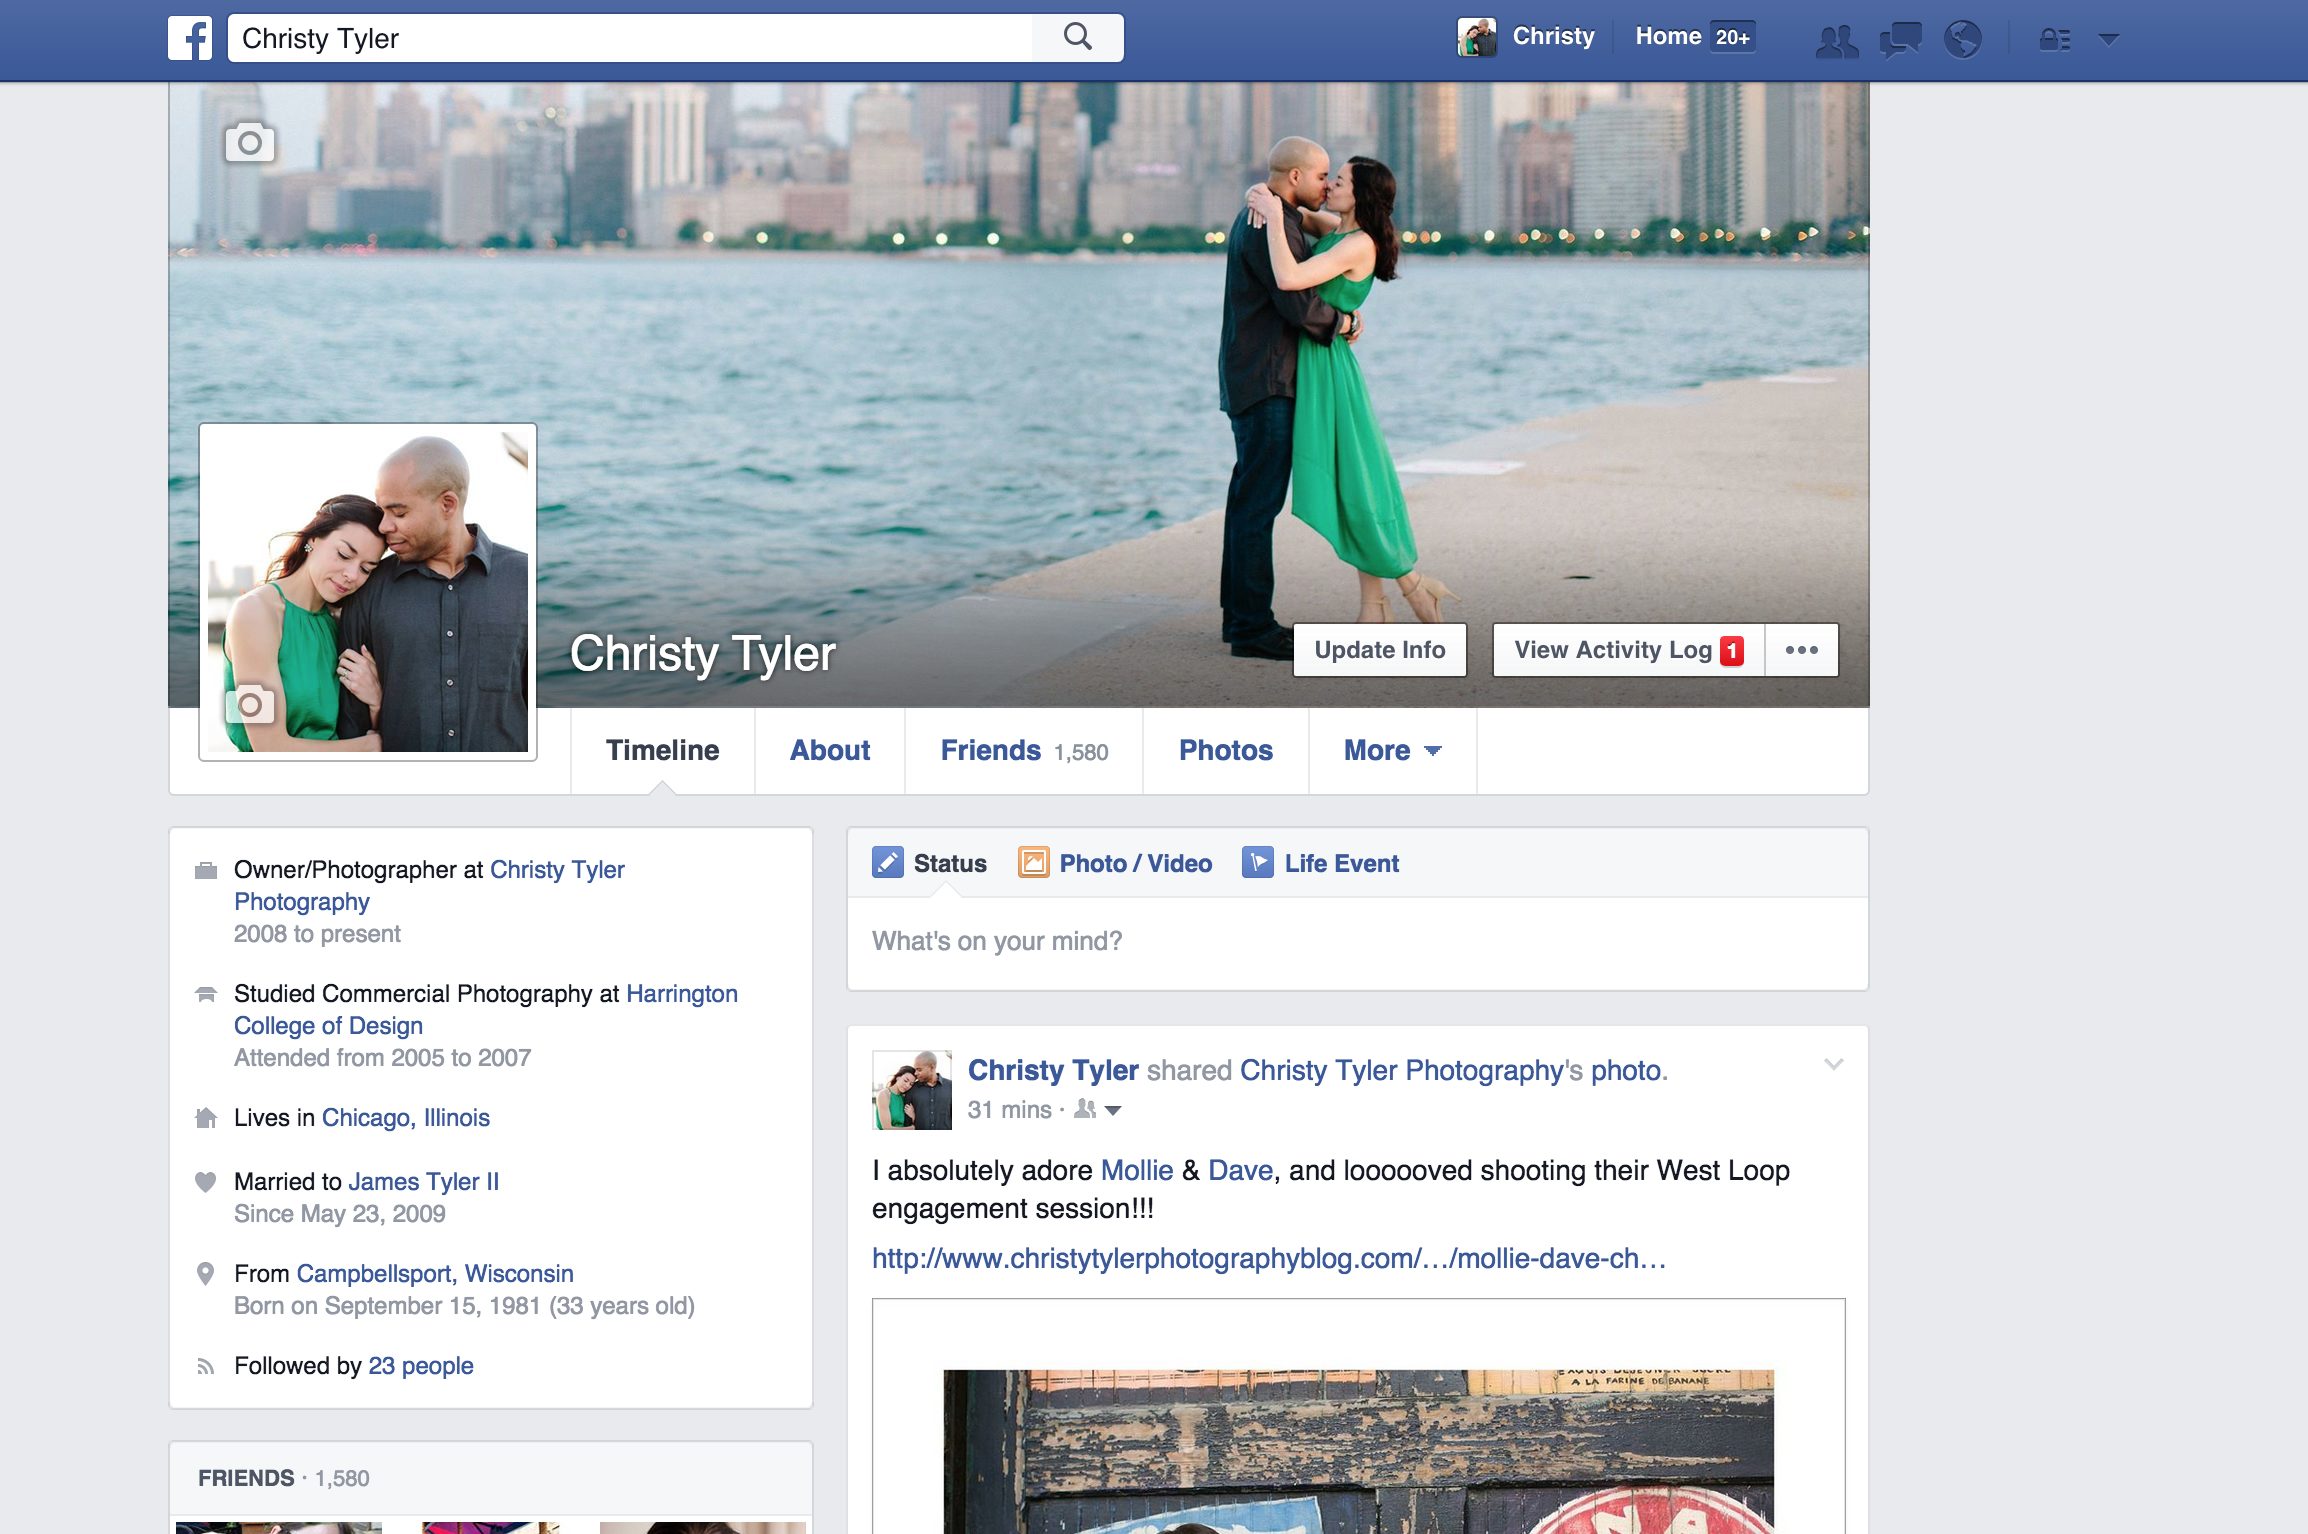
… But I SKIPPED THE CROP – so when people click to see my profile photo (or when I first uploaded it and it showed up in people’s news feeds because I changed it) – it shows up in the beautiful, high-quality, original composition that Tami intended for this photo when she took it!!!!
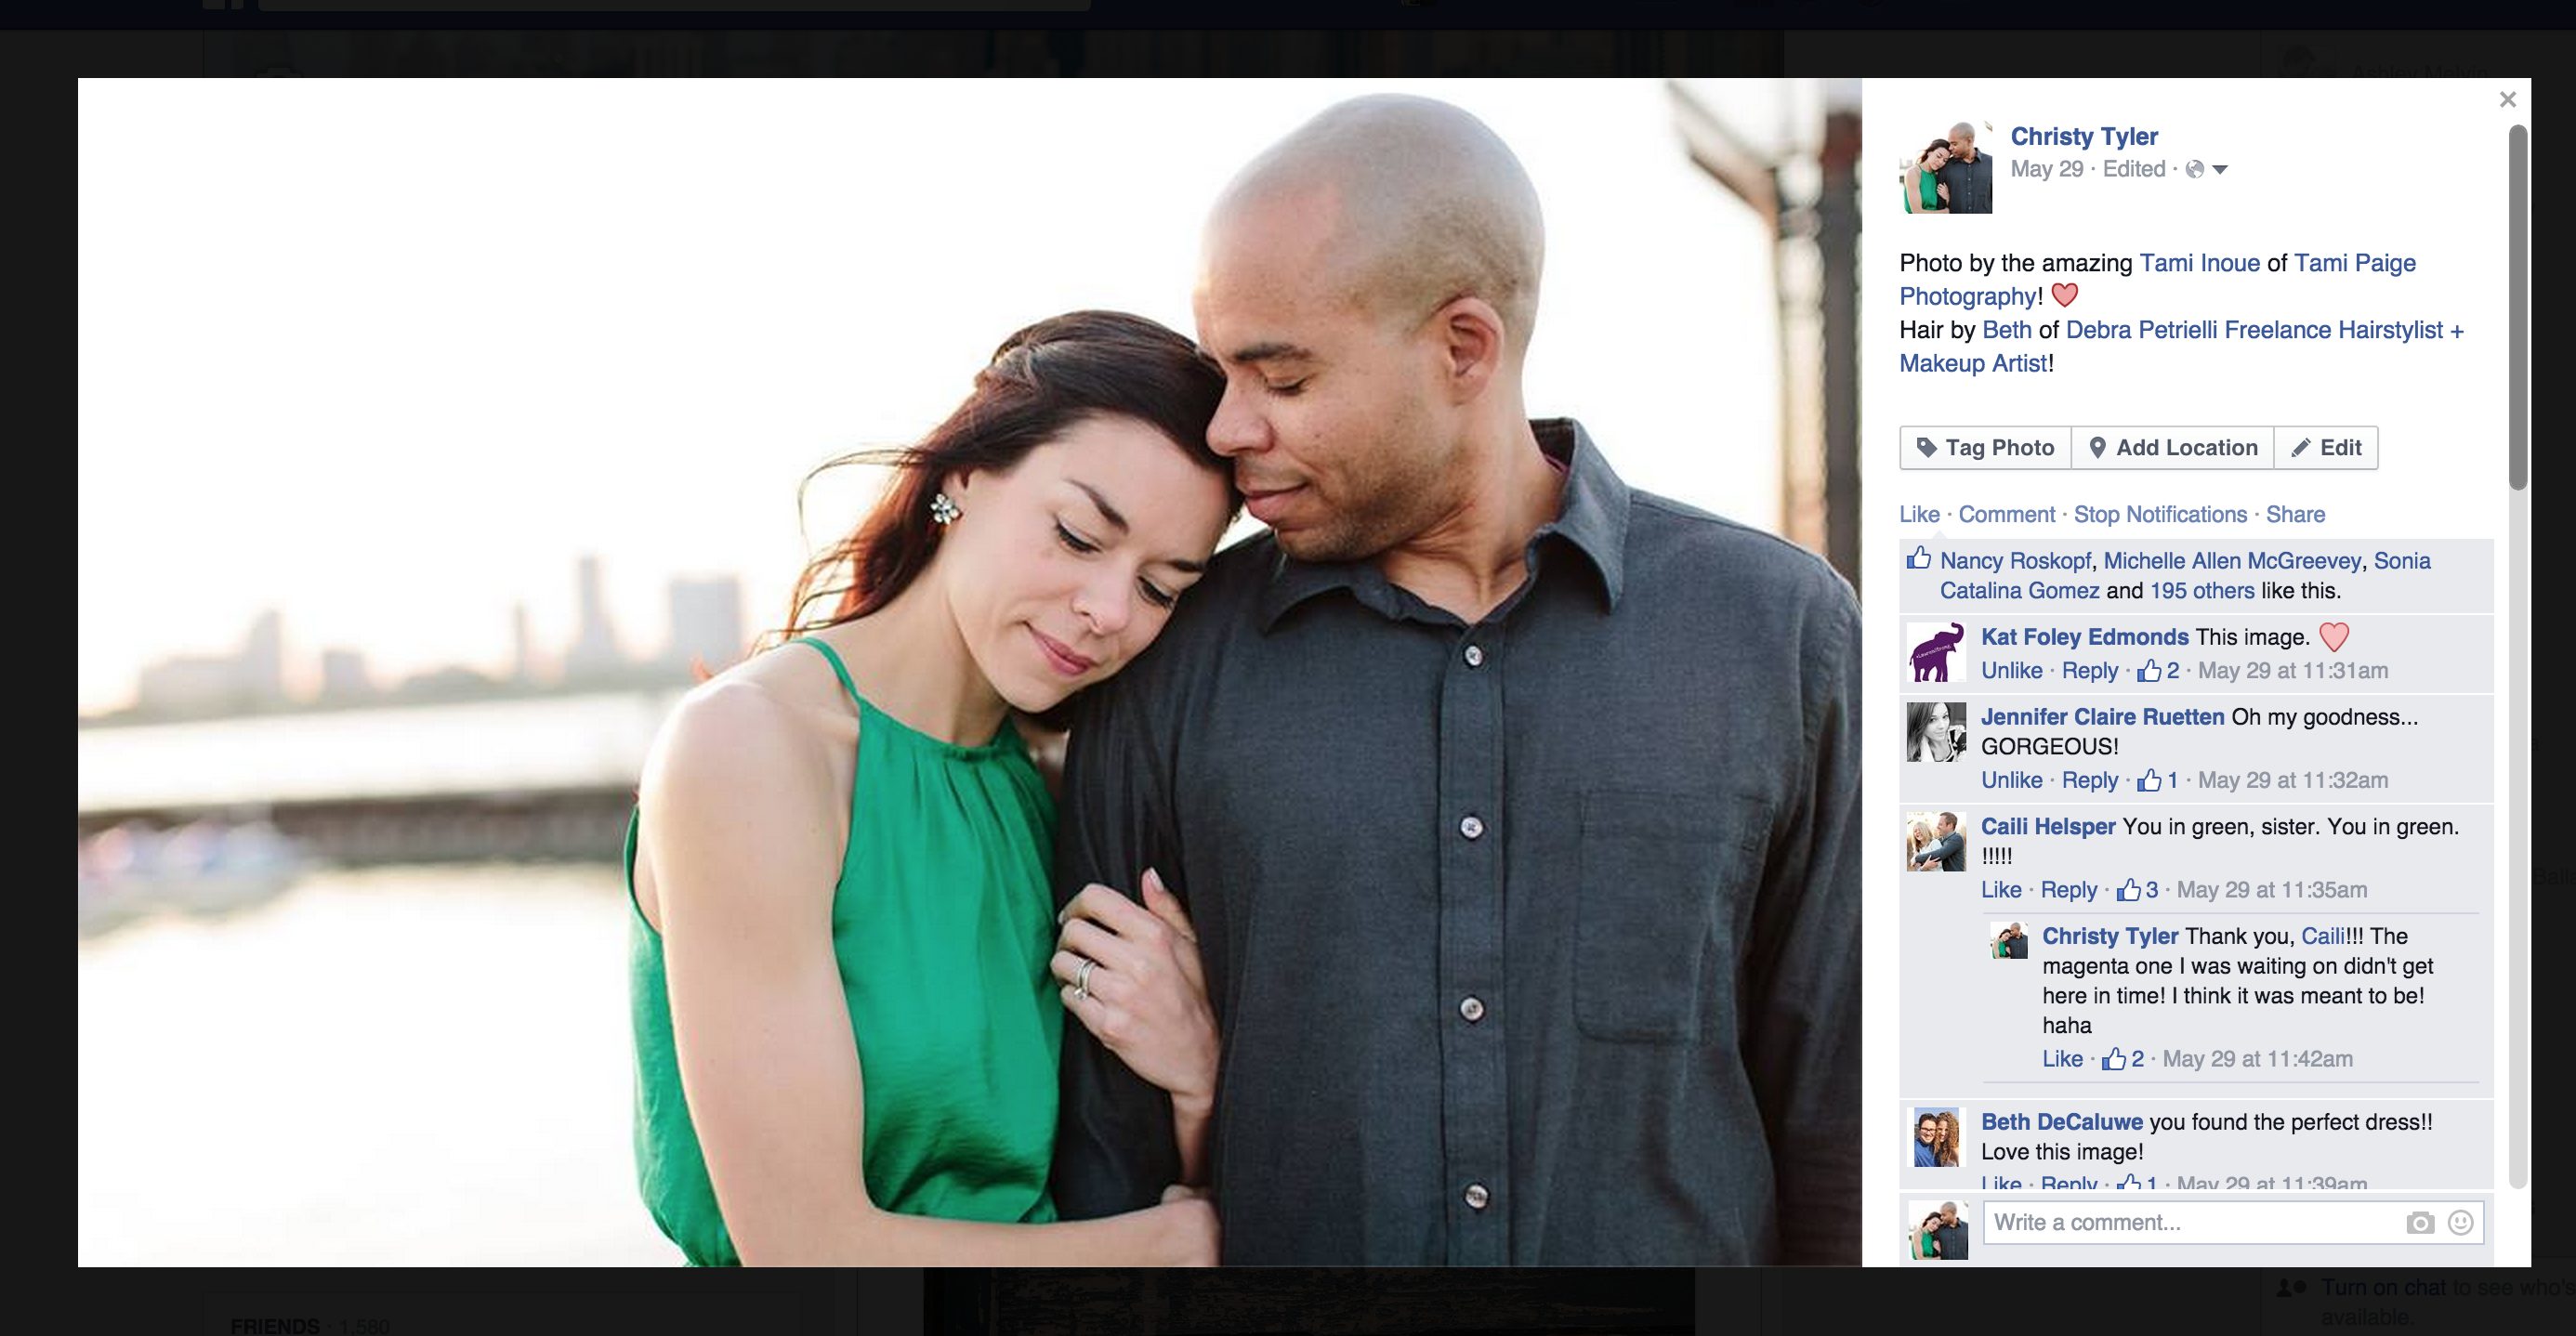
AMAZING!!!! haha. 🙂 But seriously – if you’re uploading a new Profile Picture – follow these steps!!! And please, if you are one of our clients and using a photo we took as your profile picture (yay! we love that!!) – then definitely please follow these steps so your photo will look beautiful, high-resolution, and as it was compositionally intended to look!!! 🙂
That’s your PSA for today!! 😉 Muah! xoxo

